


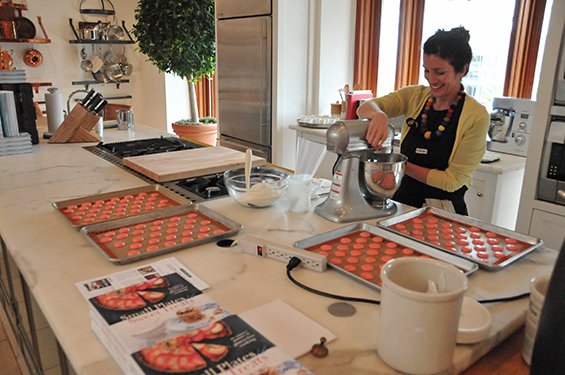
Aran Goyoaga surrounded by trays of macarons in the Williams-Sonoma demonstration kitchen
Aran Goyoaga, food photographer and stylist shares her life in food on her award-winning blog, Cannelle et Vanille. Not only is the blog a visually stunning food diary, it also provides recipe inspiration for eating gluten-free, something Aran has had to adjust to since discovering her intolerance in 2009. In the fall of 2012, she released her first cookbook, Small Plates & Sweet Treats which contains gluten-free recipes organized by season.
This past weekend, I had the pleasure of meeting Aran when she made a stop at Williams-Sonoma Union Square in San Francisco to sign her book and demonstrate how to make macarons. It is such a finicky pastry to get right so I am always interested in seeing people’s variations on the technique. I’ve jotted down some great tips from Aran and I have to say her macarons tasted delicieux.
Sift the almond flour and powdered sugar to remove any clumps
Ingredients:
Almond flour- Make sure it is as fine as possible. For me, I make sure that the flour doesn’t have any flecks of almond skin which typically is called almond meal.
Egg whites- Aging them in the refrigerator uncovered is key. Some of the moisture evaporates which helps to dry out the egg whites. Then after they’ve aged, weigh the egg whites to make sure you have the right amount.
Egg white powder- This is good to have when you are making macarons in high humidity locations. Aran happened to be using powder from the brand Deb-El which I found on Amazon.
Aran piping out the macarons. I made a quick Instagram video of it!
Technique:
Mixing- When you initially combine the egg white mixture with the dry ingredients, mix well to make sure everything is incorporated. You don’t have to be careful with it. However, once it is combined and starts to become shiny, be very gentle because you don’t want to overwork the macaron batter.
The macaron batter is ready when the batter spreads evenly back into the bowl slowly. If it dissolves too quickly then it is too runny and the macarons won’t rise and get the desired feet.
Resting- Let the piped macarons rest until when you touch it, your finger shouldn’t stick. About 30-45 minutes depending on weather.
ARAN’S TIP: After piping, sprinkle a little flaked fleur de sel on top of each macaron for a nice contrast of sweet and salty.
Baking:
Place one tray at a time, in the center of the oven. Halfway through the baking time, rotate the pan. Before baking off the next tray, make sure the oven is heated back to 350.
Doneness- If you lift the macarons, the edges should come away but the very center should still be sticky. The macarons will continue to bake on the pan while cooling. If you bake them to the point where the entire macaron comes off clean then you will have end up with crisp meringue cookies. Taking them off just beforehand will give a slightly chewy middle once assembled with the filling.
The macarons are ready and they have the little feet at the bottom!
While the macarons were cooling, it was time to sign books.
Ready for autographing
Aran’s accessories: bright red nails, gold ring and cheery pom pom necklace.
A Swiss buttercream flavored with vanilla was used for these hot pink macarons.
ARAN’S TIPS:
For the egg white mixture, use brown sugar instead of white sugar in the buttercream. Just make sure to dissolve the brown sugar completely with the egg whites when over the stove.
For the butter added to the swiss meringue, make a brown butter for a more caramelized flavor. After browning, place it in the refrigerator so it solidifies again before adding to the egg white mixture. Also add a little salt to bring out the flavors.
Time for a taste!
Here are a few more tips from the demo and my time with Aran.
Equipment:
Make sure the sheet plans are flat and not warped so they maintain their circular shape as they bake.
Silpat vs. parchment- Aran prefers using silpats for easy removal when the macaron shells have cooled.
Painting Macarons:
Use a paint brush and food color. Apply onto the macarons before or after baking.
Advice for Gluten-Free Baking:
When creating gluten-free recipes, she usually sticks to this proportion: 60% whole grains / 25% nut flours / 15% starch.
What about using all purpose gluten-free flours? It’s convenient and good for people starting out gluten-free. When developing her recipes, she likes to give each recipe proper attention and create her own flour blends based on that particular recipe.
Aran Goyoaga: Cannelle et Vanille / Twitter / Instagram / Pinterest
Check out the photo album on the Williams-Sonoma Facebook page for more highlights from the event!

 Deliciously Noted is a food blog documenting my life in San Francisco - eating, baking, meeting artisans and chefs, and my getaways to New York and Paris. Enjoy and leave a comment or two!